
Configuring proxy servers with Octoparse
Increase parsing efficiency with Octoparse: set up proxies easily. Avoid blocking by collecting data anonymously and securely.
Олег Нечипоренко
20 August 2023
4771
4771
20 August 2023
What is Octoparse?
Octoparse serves as a convenient data extraction tool, simplifying the retrieval of publicly accessible data devoid of encryption. It offers a range of functionalities, including automated IP address rotation and prolonged session duration, strategically bypassing anti-scraping measures. Through advanced machine learning algorithms, Octoparse swiftly identifies and extracts data from intricate websites. It possesses the capability to capture diverse data forms, encompassing text, links, image URLs, and HTML code.
Setting up proxy settings in Octoparse is a straightforward procedure. Here's how you can accomplish it:
- Begin by downloading and installing Octoparse from the official website. Once the installation is complete, open the program.
- Click the "+New" button situated in the top left corner to initiate the creation of a new task. Choose "Custom task" from the array of available options.

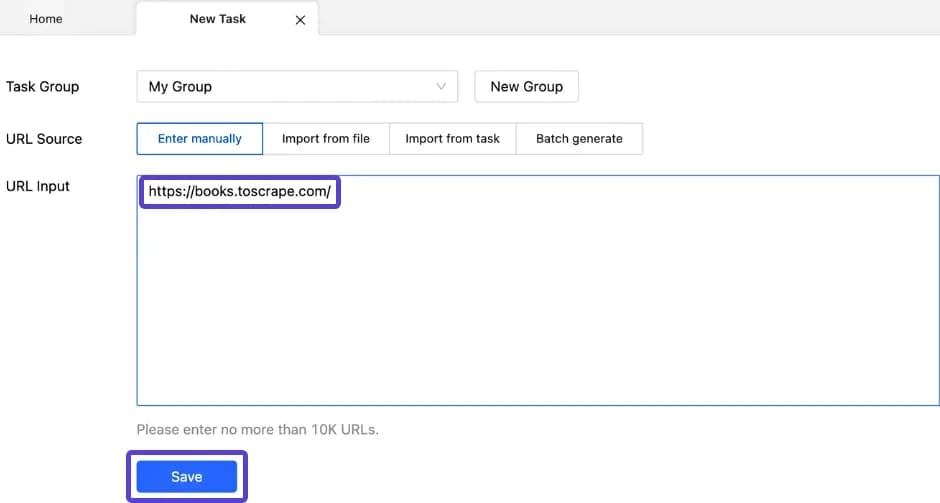
- Input the URL of the specific web page from which you intend to extract data into the designated URL input box. For instance, let's use "books.toscrape.com" as an example. Subsequently, click the Save button.

- Upon successfully uploading the chosen URL, proceed to click the "Settings" button positioned in the upper right corner.

- Scroll down until you locate the "Anti-lock settings" section.
- Select the checkbox labeled "Access websites via proxy servers." Following this, the options for utilizing your personal proxy servers and the "Configure" button will become accessible.

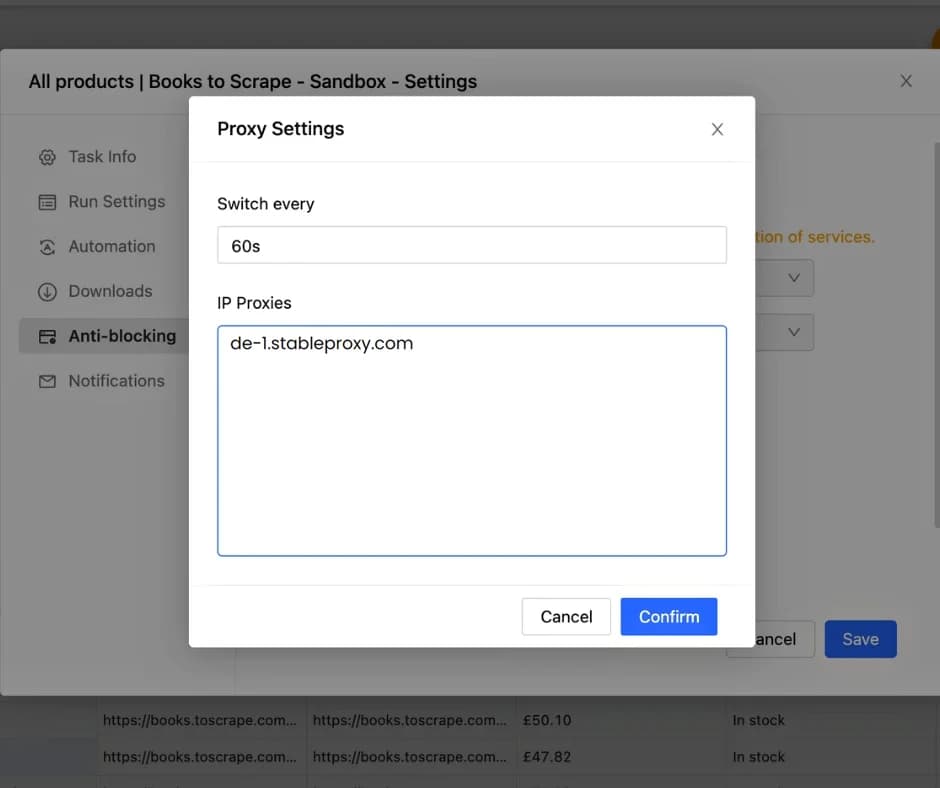
- Configure button, prompting a pop-up window to emerge. Within this window, copy and paste the IP addresses of your stableproxy servers into the designated box. Ensure that the format follows IP:PORT conventions.
For Rotating Residential Proxies:
Opt for IP address: Provide the specific IP address corresponding to the rotational proxy servers. As an illustration, let's employ the IP address de-1.stableproxy.com.

- Customize the switching interval according to your preference, based on whether you are utilizing a rotating or sticky session approach.
- Confirm your adjustments by clicking on the Confirm button to preserve the changes.
- To validate the successful integration of Octoparse, verify the presence of a checkmark adjacent to the Customise button within the Anti-Lock Settings section.
- Safeguard your modifications by clicking on the Save button.
- You will be redirected back to the initial page's home screen.
- Expand the options by clicking the lightbulb icon, then decide whether to enable pagination or scrolling.
- Once you've made your selection, proceed to click the Create Workflow button.

- Highlight the specific page element you wish to extract, such as "Enigma." Proceed to click on it and opt for "Extract text of selected element."
- A pop-up window will materialize. Click "Save" located in the top right corner, followed by "Execute."
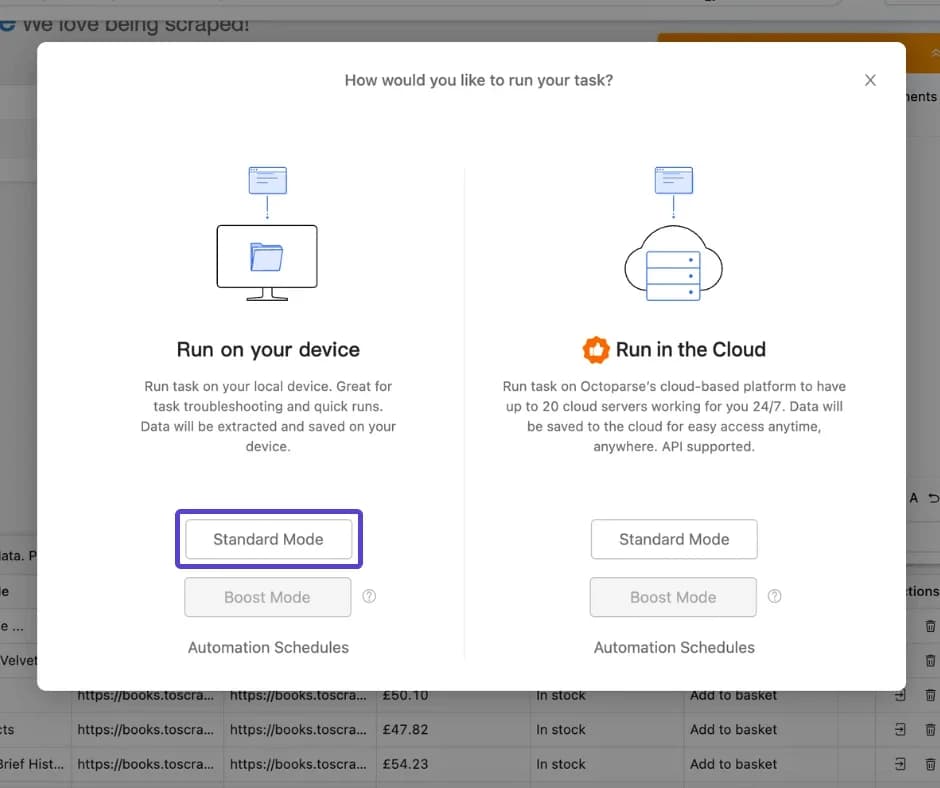
- Another pop-up window will emerge, presenting a variety of options. Select the one most aligned with your requirements (certain options may involve a fee). In our example, we will pick "Run on your device" and "Standard mode."

- A fresh page will open, initiating the scraping process. You have the option to pause and resume it as required.
- Given that this is solely an example, we'll conclude here. Affirm the cessation of the operation.
- Subsequently, you'll encounter statistics pertaining to your scraping task. Decide whether to export the data promptly or at a later time; for now, we'll opt for "now."
- A concluding pop-up window will emerge, enabling you to choose the desired data format for extraction.
- Select the format that aligns with your specific needs.
With these steps completed, you're all set! Your setup is complete, and you're poised to engage in data extraction tasks from web pages using Octoparse.

